Fix
Why is my embroidery puckering? Causes and fixes for hand stitching
Published
As an Amazon Associate we earn from qualifying purchases. This does not change our picks. Affiliate disclosure
New to Prime? Try Prime free for fast, free shipping on eligible items.
Short answer
Hand embroidery puckers when the stitches hold the fabric tighter than the fabric around them. The usual causes, most likely first: stitches pulled too tight, fabric slack in the hoop, thin or stretchy fabric with no stabilizer, too many strands, and long threads carried across the back. Mild puckering often presses out damp. Tight stitches have to be redone.
Gear for this job
All 7 picks comparedNurge square plastic embroidery hoops, set of 3
See price on AmazonSee it on AmazonCaydo beech wood embroidery hoops, 7, 8 and 9 in
See price on AmazonSee it on AmazonMufekum Beech Wood Embroidery Hoops, 4-8 in, 5 Pcs
See price on AmazonSee it on Amazon
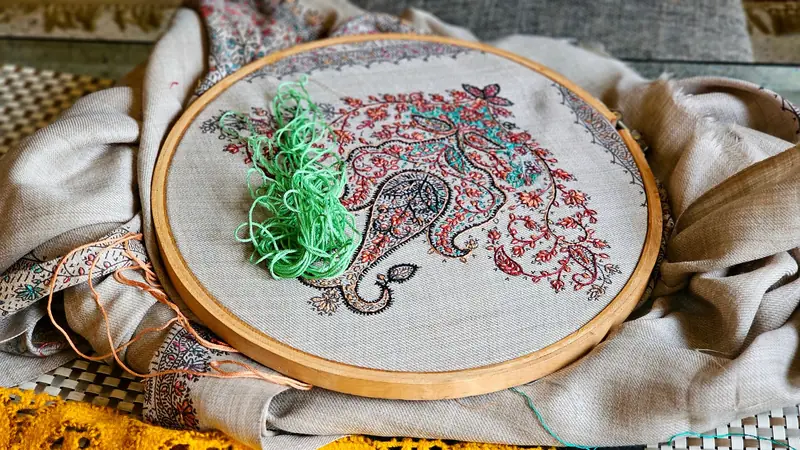
This page is about hand stitching: surface embroidery and cross stitch worked with a needle and floss in a hoop or frame. Machine embroidery puckers for other reasons, and its fixes do not apply here. In hand work three things decide whether the fabric stays flat: how hard each stitch is pulled, how taut the fabric is held while you stitch, and whether the fabric is firm enough for the amount of thread going into it.
Hand embroidery puckering: signs, causes and fixes
Look at where the wrinkles are and when they appeared. The rows are in order of likelihood for hand stitching. More than one cause can be at work in the same piece.
| What you see | Likely cause | What to do |
|---|---|---|
| Fabric gathers along a line of stitches or around a filled shape | Stitches pulled too tight | Redo the tight stitches. Stop pulling when the thread lies flat on the fabric. |
| Ripples across the whole design. Fabric dips when pressed in the hoop | Fabric slack in the hoop | Re-hoop until the fabric sounds like a drum when tapped. Retighten as you work. |
| Wrinkles around dense stitching on thin cotton, a T-shirt or another knit | Thin or stretchy fabric without stabilizer | Back the fabric with stabilizer or a second layer of cotton before stitching. |
| Stitches look crowded and raised. Fabric bulges between them | Too many strands for the fabric | Use one strand fewer. On 14 count aida, 2 strands for crosses. |
| A dimple or a straight pull line between two stitched areas | Long thread carried across the back | Snip the carry and weave in both ends. End the thread instead of jumping. |
| Flat in the hoop, wrinkled once it came out or after washing | Tight stitches hidden by the hoop, or fabric that shrank in the wash | Press damp, face down between towels. Redo stitches that still pull. |
| A ring-shaped crease where the hoop sat | Hoop left on between sessions: a hoop mark, not puckering | Wash and press. Take the work out of the hoop after each session. |
Why does my embroidery pucker? Most often, tight stitches
Each stitch is a short bridge of thread between two holes. Pull it past the point where it lies on the fabric and it draws the two holes toward each other. A row of them, or a block of satin stitch, shortens the fabric under the stitching while the fabric around it stays full size, and the difference shows as wrinkles. DMC's hoop guide names over-tight stitches as the cause of puckered fabric and a distorted design.
The check: slide the tip of the needle under a stitch. If it will not go under without lifting the fabric, the stitch is too tight. Stop pulling the moment the thread lies flat on the surface. In a taut hoop, stitch in two movements: push the needle straight down and pull through from the back, then come straight up. Scooping the needle in and out in one motion bends the fabric and tightens every stitch.
Tight stitches cannot be loosened once the thread is secured: they have to come out and be restitched. The method is in how to fix cross stitch mistakes, and it is the same for surface stitches.
Fabric slack in the hoop
Each stitch pulls a little fabric toward it, and when the piece comes out of the hoop that fabric cannot spread back. Hooped properly, the fabric sounds like a drum when tapped and does not dip under a fingertip. Tighten in stages: press the outer ring on, pull the fabric edges evenly all the way round, turn the screw, and repeat. Fabric loosens as you work, so tap it each time you pick the piece up and retighten when the drum sound has gone.
A hoop that will not hold is a separate problem with its own fixes: a screwdriver on the screw first, then binding the inner ring with cotton twill tape. See embroidery hoop won't tighten.
Thin or stretchy fabric without stabilizer
Thin cotton and all knits give way under dense stitching. The thread is stronger than the fabric, so the fabric folds. T-shirts add a second problem: if the knit is stretched in the hoop, the stitches are laid on stretched fabric, and it springs back around them when the hoop comes off. Hoop a knit flat, never stretched.
The fix is to add a layer that does not stretch. For shirts and other stretchy fabric, a self-adhesive wash-away sheet (stick and stitch stabilizer) goes on the front, carries the printed design and rinses out afterwards. It needs washable fabric and colorfast thread. For thin woven cotton, a second layer of plain cotton hooped behind the top fabric gives the stitches something firmer to sit on.
Too many strands and long carries on the back
The hole the needle makes should be just large enough for the thread, and no larger. Six strands forced through fine cotton, or 3 strands on 16 count aida, push the fabric threads apart and the surface buckles. The usual numbers are 2 strands for crosses on 14 and 16 count aida and 3 on 11 count: the full table is in how many strands of floss to use.
A thread carried across the back from one area to another acts like a drawstring. Pulled even slightly tight, it draws the two areas together and leaves a dimple or a straight line between them. End the thread by weaving it under the last few stitches on the back, and start again in the new area. If a carry is already pulling the fabric, snip it in the middle and weave each cut end under nearby stitches on the back.
How to fix puckered embroidery after it is finished
Mild puckering and hoop creases usually relax when the piece is pressed damp. Puckering that shows up only after washing has two usual sources: tight stitches that the hoop was hiding, and fabric that shrank a little while the stitched area did not. The cure is the same. Hand-dyed and unbranded floss may not be colorfast: wet a thread end first.
- 1
Rinse the piece under cold running water, then hand wash it gently with a small amount of non-biological detergent. Rinse in cold water until the water runs clear.
- 2
Roll the piece between two clean towels and squeeze. Do not wring it: wringing sets new creases into the fabric.
- 3
Lay it on a dry towel and ease it back to square with your hands, edges straight and corners at right angles. Let it air dry until damp, not dry.
- 4
Place it face down between two clean towels and press lightly with a warm iron, working from the center outward. The towels keep the stitches from being crushed.
- 5
Leave it flat until fully dry. A piece that dried warped can be dampened again, pinned square to a padded board with rustproof pins and left to dry pinned.
Note.Pressing cannot lengthen a stitch. If the fabric still gathers around the same stitches once dry, they are too tight: redo them, or let the piece be stretched lightly when it is mounted.
How to stop puckering on the next piece
Puckering is far easier to prevent than to press out. These six habits cover every cause in the table above, in the same order.
- Pull each stitch only until the thread lies flat. Slide the needle tip under a stitch now and then to check.
- Hoop the fabric drum tight and retighten whenever the drum sound fades.
- Choose firm cotton or linen that does not stretch for surface embroidery. Stabilize knits and thin cotton before the first stitch.
- Match the strands to the fabric, and use one strand fewer if stitches look crowded.
- End the thread instead of carrying it across open fabric on the back.
- Take the work out of the hoop between sessions so the ring does not crease the fabric.
Quick answers
Short answers to the questions asked most often about puckered hand embroidery and warped cross stitch. Each one is covered in more detail above.
- Why does my embroidery pucker? In hand work the most common cause is stitches pulled too tight, followed by fabric that is slack in the hoop.
- How to fix puckered embroidery? Wash it, then press it damp, face down between two towels. Stitches that still pull have to be redone.
- How to fix embroidery puckering after washing? Dampen it again, ease it square and press it face down between towels.
- How to fix warped cross stitch? Dampen it, pull it gently back to square, pin it to a padded board and let it dry flat.
- Why does my embroidery look bad? Wrinkled fabric is puckering. Fabric showing through the stitches is a coverage problem: see why cross stitch has gaps.
What you need for this
- See price on AmazonAmazon
Nurge square plastic embroidery hoops, set of 3
From Best embroidery hoops for hand embroidery: wood vs plastic
- See price on AmazonAmazon
Sulky Stick 'n Stitch printable sheets, 12 pack
From Best water soluble embroidery paper for transferring patterns
- See price on AmazonAmazon
Q-Snap Needlework Frame Bundle, 3 Sizes
From Best cross stitch frames: Q-Snap frames and scroll frames compared