How-to
How to use an embroidery hoop: putting fabric in, step by step
Published
As an Amazon Associate we earn from qualifying purchases. This does not change our picks. Affiliate disclosure
New to Prime? Try Prime free for fast, free shipping on eligible items.
Short answer
Loosen the screw, lay the inner ring flat on a table, center the fabric over it and press the outer ring down on top. Tighten the screw in stages, pulling the fabric edges evenly between turns, until the fabric sounds like a drum when tapped. Retighten from time to time, and take the fabric out of the hoop when you stop for the day.
Gear for this job
All 7 picks comparedNurge square plastic embroidery hoops, set of 3
See price on AmazonSee it on AmazonCaydo beech wood embroidery hoops, 7, 8 and 9 in
See price on AmazonSee it on AmazonMufekum Beech Wood Embroidery Hoops, 4-8 in, 5 Pcs
See price on AmazonSee it on Amazon
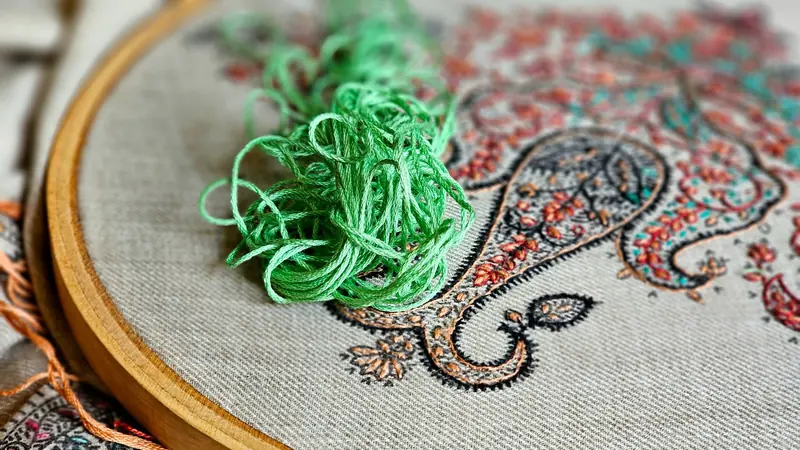
These steps are for a round hand embroidery hoop: two rings of wood or plastic, the outer one split and closed by a screw. They are the same for surface embroidery and for cross stitch. What decides the result is the order of the work. The fabric is pulled smooth while the screw is still partly loose, and only then locked. If the screw is tightened fully first, the ripples are locked in with it. Machine hoops load differently and are not covered here.
Embroidery hoop parts and what to have ready
A hoop has two parts. The inner ring is a closed circle. The outer ring is split, and the screw draws the two ends of the split together so the ring squeezes the fabric against the inner ring. Nothing else holds the fabric, so the whole method is about getting that squeeze even all the way around.
- A hoop 1 to 1.5 in larger than the design. Sizes and what each one fits are in the embroidery hoop size chart.
- Fabric with at least 3 in (8 cm) to spare on every side of the design, so the rings have something to grip.
- An iron. Press the fabric flat first: a hoop holds fabric taut but does not remove creases.
- A small screwdriver that fits the slot in the screw head, for the final tightening if fingers are not enough.
How to put fabric in an embroidery hoop
Work on a table, not in your lap. The inner ring has to lie flat for the outer ring to go on level. The whole job takes a minute or two once the order is familiar.
- 1
Loosen the screw a few turns, until the outer ring lifts off the inner ring with no force. Leave the screw in its nut. Separate the two rings.
- 2
Lay the inner ring flat on the table. Lay the fabric over it, right side up, with the design in the middle of the ring and a similar amount of fabric hanging over on all 4 sides.
- 3
Press the outer ring straight down over the fabric and the inner ring until the 2 rings sit level with each other. If it will not go on, loosen the screw 1 more turn. Do not force it.
- 4
Turn the screw until the outer ring just grips. At this stage the fabric should hold its place but still slide when you pull it.
- 5
Pull the fabric edge gently outward at 4 points in line with the weave: top, bottom, left, right. Then go around the hoop once more, easing out the ripples between those points.
- 6
Tighten the screw a little, pull around the hoop again, and repeat. 2 or 3 rounds of pull and tighten are usually enough to reach finger-tight.
- 7
Tap the fabric with a fingertip. If it sounds like a drum, stop. If it sounds dull, pull around once more and give the screw a final turn, using the screwdriver if needed.
Note.Pull straight out along the threads of the fabric. A hard pull on the diagonal stretches the weave out of square, and the design goes out of shape with it.
How tight should fabric be in an embroidery hoop?
Taut fabric sounds like a drum when tapped. That is the test that the job is done, and it works on any woven fabric. Slack fabric is one of the main causes of puckered stitching, because each stitch pulls loose cloth toward itself. The other causes are listed in why is my embroidery puckering.
- Sound: a tap gives a clear drum note, not a dull thud.
- Surface: no ripples near the rings, and the fabric springs back when pressed with a fingertip.
- Weave: the threads of the fabric run straight across the hoop, and any drawn design lines are not bent.
- Rings: the outer ring sits level with the inner ring all the way around, not higher on one side.
Note.Stretch fabric such as T-shirt knit is the exception. Hoop it flat and firm, but do not stretch it to a drum. Stretched knit relaxes when it leaves the hoop and the stitches pucker.
How to hold an embroidery hoop while you stitch
Hold the rim with the hand you do not stitch with: rim against the palm, thumb on top, fingers underneath. In a 6 to 7 in hoop those fingers can reach toward the middle of the fabric, which is why that size is the comfortable one to hold. Turn the hoop so the screw sits near the top, on the side away from your stitching hand. There the working thread is least likely to loop around it.
Grip the rings, not the fabric. Fingers pressing on the taut fabric from below push it slack again. A hoop of 10 in or more is tiring to hold by the rim, so a stand that takes its weight is the usual answer for large hoops.
Retighten and move the hoop as you work
Fabric loosens a little as you stitch. That is normal. From time to time, repeat the last step: pull around the hoop, tighten the screw, tap. If the fabric goes slack every few minutes however hard the screw is turned, the hoop itself is the problem, and the fixes are in embroidery hoop won't tighten.
For a design larger than the hoop, finish one area, loosen the screw fully, lift the outer ring off and reload the hoop over the next area. Do not slide a tight hoop across the fabric. Flat stitches cope with being under the ring for a short time. Raised stitches such as French knots can be flattened, so leave those until the hoop no longer has to sit on that area.
Take the fabric out of the hoop between sessions
A hoop left on causes creases: a ring pressed into the fabric that gets harder to remove the longer it stays. When you finish for the day, loosen the screw, lift the outer ring off and put the fabric away flat or loosely rolled. Do not pull the fabric out of a tight hoop. Loading it again next time takes a minute.
A light ring mark often comes out when the finished piece is washed and pressed face down between towels, as described in how to wash cross stitch and embroidery. Wrapping the inner ring with cotton twill tape or bias tape also protects the fabric and adds grip.
Quick answers
Short answers to the questions that come up the first time a hoop is loaded. Each one points back to the numbered steps above.
- How do you set up an embroidery hoop? Loosen the screw, separate the rings, and put the inner ring flat on a table. The fabric goes over it and the outer ring goes on last.
- How do you put on an embroidery hoop so the design is centered? Center the design over the inner ring before pressing the outer ring down. For cross stitch, fold the fabric in half twice to find the center.
- How do you load an embroidery hoop tight enough? Tighten in 2 or 3 stages, pulling the fabric edges between each one, until the fabric sounds like a drum when tapped.
- How do you hold an embroidery hoop? By the rim, in the hand you do not stitch with, with the screw near the top and away from your stitching hand.
- Do embroidery hoop instructions differ for cross stitch? No. The steps are the same, and the hoop still comes off between sessions.
What you need for this
- See price on AmazonAmazon
Nurge square plastic embroidery hoops, set of 3
From Best embroidery hoops for hand embroidery: wood vs plastic
- See price on AmazonAmazon
ZOCONE beech wood lap stand with 6 and 8 in hoops
From Best embroidery hoop stands: lap, table clamp and floor models
- See price on AmazonAmazon
Q-Snap Needlework Frame Bundle, 3 Sizes
From Best cross stitch frames: Q-Snap frames and scroll frames compared