How to frame cross stitch and embroidery fabric without ruining it
Published
As an Amazon Associate we earn from qualifying purchases. This does not change our picks. Affiliate disclosure
New to Prime? Try Prime free for fast, free shipping on eligible items.
Gear for this job
All 5 picks comparedQ-Snap Needlework Frame Bundle, 3 Sizes
See price on AmazonSee it on AmazonQ-Snap Frame Set, 11 x 11 in with 14 x 14 Kit
See price on AmazonSee it on AmazonBeech Needlepoint Scroll Frame, 15.7 x 22 in
See price on AmazonSee it on Amazon
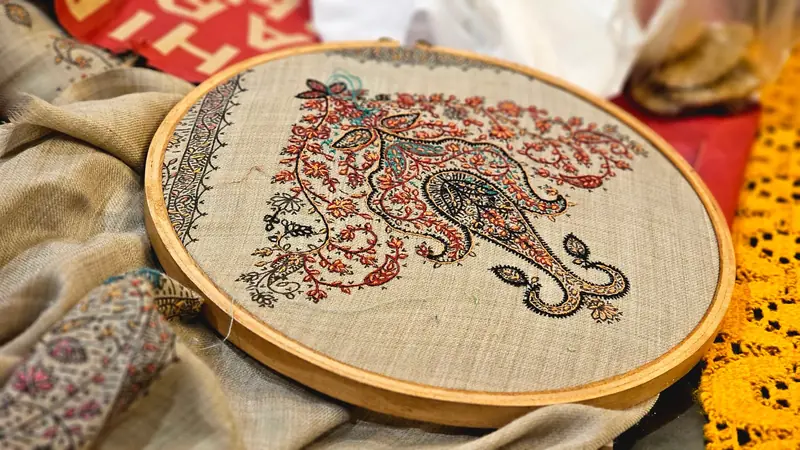
To frame finished cross stitch or embroidery, wash and press the piece, stretch it over acid-free mounting board, lace or tape the fabric edges on the back, and set the board in a frame with a mat or spacer so the glass never touches the stitches. Do not glue the fabric to the board. Glue yellows over time and cannot be undone, while lacing can be redone if the piece slips or you want to restage it later.
Prepare the stitching before you mount it
Wash and press first if the piece is dirty or the grid marks need to come out. Rinse in cool water with a mild soap, roll it in a clean towel to blot, and let it dry flat. Press it face down on a thick towel with a medium iron so the stitches sit up instead of being flattened.
Leave generous margins when you trim. Plan on at least two inches of fabric beyond the design on every side so there is enough to wrap around the board and lace. If you did not leave that margin, you can sew a strip of scrap fabric to the edge to extend it.
Check for stray threads on the back and for tails that show through light fabric. Trim dark tails short so they do not shadow on the front.
Choose the board, mat and glass
Use acid-free foam core or mounting board cut to the size of the frame opening, not ordinary cardboard. Regular cardboard contains acids that stain fabric over years. Foam core is light and takes pins well, which is helpful when you pin the fabric in place.
A mat lifts the glass away from the stitches. Without a mat or a spacer, glass pressing on the surface flattens the thread and traps moisture. Pick a mat opening that leaves roughly an inch of fabric visible around the design, or go with a spacer inside a deep frame.
Glass with a UV-filtering coating slows fading if the piece hangs in a bright room. Avoid hanging any stitching in direct sun, whatever glass you use. Floss colors, especially reds, can fade over years.
Mount the fabric on the board
Center the design on the board with the face up and check the position against the mat. Fold the fabric over the edges and pin it into the foam core along the sides, starting at the middle of each edge and working toward the corners. Pull gently so the grid stays straight, since the fabric threads should run parallel to the board edges.
Once the piece is square and taut but not stretched tight, flip the board over. Lace across the back with strong thread, working from side to side and then top to bottom, pulling evenly. Lacing lets you adjust tension later. Tape is faster, but use an archival tape and keep it off the front of the fabric.
Fold the corners neatly, like wrapping a present, so the back stays flat and fits in the frame. Trim excess fabric at the corners so the folds are not bulky, because a thick corner pushes against the backing board and shows as a bump on the front. Check the front once more before you close the frame, and straighten any row that has drifted.
Frame it, or keep it in a hoop or scroll frame
Place the mounted board in the frame, add a backing board, and secure it with the frame's tabs or points. A dust cover paper over the back keeps dust out and gives the piece a finished look.
Not every piece needs glass. Many hand embroidery pieces look better left in the hoop that they were stitched in. Trim the fabric to about an inch beyond the hoop, run a gathering stitch around the edge and pull it tight, then cover the back with felt. This is simpler and keeps the texture visible.
If you stitch on a scroll frame, the frame itself is not a display frame. Remove the work before you mount it. Q-Snap frames and scroll frames hold fabric during stitching but are not designed for hanging.
Standard frame sizes and fit
Standard picture frame sizes such as 5x7, 8x10 and 11x14 inches are the cheapest to buy, so it helps to size the piece for them. Measure the stitched area, then add the margin you want for a mat. For a design that is 6 by 8 inches, an 11x14 frame with a mat fits easily.
For counted cross stitch the stitched size depends on the fabric count. The same chart is smaller on 18 count aida than on 14 count. Divide the number of stitches by the count to get the inches. Check the size before you buy a frame, not after.
Custom framing costs more but handles unusual sizes. If you will frame several pieces, standard sizes are the economical choice.
Frequently asked questions
Can I glue cross stitch to the board? It is better not to. Glue yellows with age, can stain the fabric and cannot be reversed. Lace or pin the fabric instead.
Should I put cross stitch under glass? Glass protects against dust and handling, but it must not touch the stitches. Use a mat or spacer. Embroidery with raised stitches such as French knots is often better left without glass or with a deep frame.
How much extra fabric do I need to frame? Allow at least two inches around the design on every side. More is better, since you can always trim it.
Do I have to wash the piece before framing? Only if it is dirty or has marks from a water-soluble pen or grid. Washing a clean piece risks color bleed, so test with a damp cloth if you are unsure.
What you need for this
- See price on AmazonAmazon
Q-Snap Needlework Frame Bundle, 3 Sizes
From Best cross stitch frames: Q-Snap frames and scroll frames compared
- See price on AmazonAmazon
Nurge square plastic embroidery hoops, set of 3
From Best embroidery hoops for hand embroidery: wood vs plastic
- See price on AmazonAmazon
Fiskars 4 in curved embroidery scissors, stainless
From Best embroidery scissors: small, sharp and curved-tip picks