How-to
How to back an embroidery hoop: 4 ways to finish the back
Published
As an Amazon Associate we earn from qualifying purchases. This does not change our picks. Affiliate disclosure
New to Prime? Try Prime free for fast, free shipping on eligible items.
Short answer
Trim the fabric to 1 to 2 in (2.5 to 5 cm) beyond the hoop, work a running stitch around the edge and pull it tight so the fabric gathers behind the inner ring. For a neater back, sew a felt circle over the gathers with blanket stitch. Glue or a card insert is quicker, but glue is permanent. Hang the hoop by its screw fitting.
Gear for this job
All 7 picks comparedNurge square plastic embroidery hoops, set of 3
See price on AmazonSee it on AmazonCaydo beech wood embroidery hoops, 7, 8 and 9 in
See price on AmazonSee it on AmazonMufekum Beech Wood Embroidery Hoops, 4-8 in, 5 Pcs
See price on AmazonSee it on Amazon
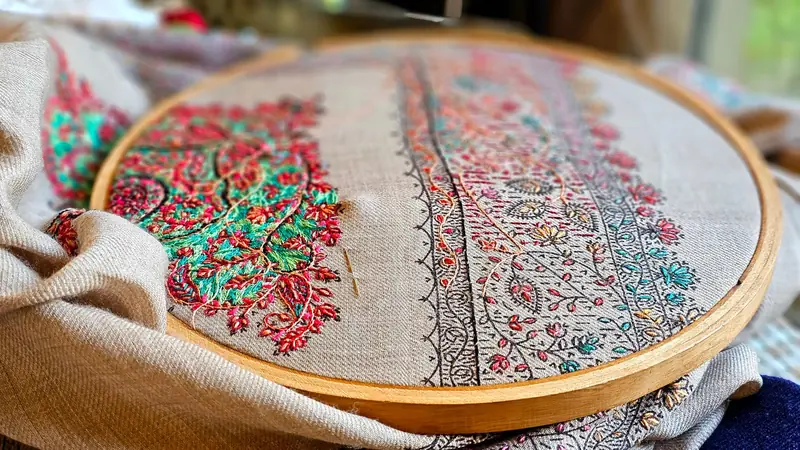
This is for a finished piece of hand embroidery or cross stitch that will stay in its hoop as the frame. Two things decide the method: whether the piece may ever come out of the hoop again, to be washed or reframed, and whether anyone will see the back. Stitched finishes can be unpicked later and leave the fabric unharmed. Glue cannot.
Embroidery hoop backing: the 4 methods compared
All four methods hide the raw fabric edge behind the hoop. If you are unsure, use the gathered running stitch. It needs only a needle and thread, and a felt circle can be added over it at any time.
| Method | What you need | Can it be undone? | Use it for |
|---|---|---|---|
| Gathered running stitch | Needle, strong thread, scissors | Yes: cut one thread | Pieces you may wash or reframe later |
| Felt circle with blanket stitch | Felt, pencil, needle, floss, scissors | Yes: unpick the edge stitches | Gifts, and any hoop whose back is seen |
| Glued fabric | Fabric glue or hot glue, scissors | No: the fabric is stuck to the ring | Ornaments that stay in the hoop for good |
| Card or cork insert | Cardstock or thin cork sheet, pencil, scissors | Yes if pressed in, no if glued | A fast cover with room for a name and date |
Before you finish the back: wash, center and trim
Do the cleaning first. Once the back is closed, hoop marks and hand oils are shut in. Wash and press the piece, let it dry fully, then put it in the display hoop. That hoop should be 1 to 1.5 in larger than the design, as in the hoop size chart.
How much fabric to leave: enough to fold over the inner ring without piling up in the center. Published tutorials range from about 1 in to 2 to 3 in beyond the hoop edge. 1 to 2 in (2.5 to 5 cm) covers the common sizes, and a 3 or 4 in hoop needs the lower figure. Fabric cut with the 3 in margin per side from the cross stitch calculator leaves plenty to trim.
- 1
Put the piece in the hoop with the screw at the top center of the design. Tighten in stages while pulling the edges evenly, until the fabric sounds like a drum when tapped. The full method is in how to use an embroidery hoop.
- 2
Check from the front that the design is centered and the fabric threads run straight. Then give the screw a final turn with a screwdriver.
- 3
Turn the hoop over and trim the fabric in a circle 1 to 2 in (2.5 to 5 cm) outside the hoop edge.
Method 1: gathered running stitch (can be undone)
This is the standard finish and the base for the felt method. One thread gathers the margin like a drawstring behind the inner ring. You need a sharp needle, scissors and a strong thread, such as several strands of floss in a color close to the fabric.
- 1
Cut a thread as long as the hoop's circumference (3.14 x the diameter) plus about 10 in for two tails. For a 6 in hoop that is about 29 in. Do not knot the end.
- 2
Start near the screw and leave a 4 to 5 in tail. Work running stitches about 1/4 to 1/2 in long all the way around the margin, about 1/2 in from the raw edge.
- 3
Back at the start, pull both tails together so the margin gathers evenly toward the center and lies flat against the back of the stitching.
- 4
Tie the two tails in a double knot, trim them to about 1/2 in and tuck the ends under the gathers.
Method 2: felt circle with blanket stitch
A felt circle covers the gathers and gives the neatest back for a gift. Felt does not fray, so its cut edge needs no hem. You need felt at least as large as the hoop, a pencil, and floss that matches the felt. Finish Method 1 first.
- 1
Trace a circle the size of the inner ring on the felt and cut it out. With the piece already hooped, trace around the whole hoop instead and trim the circle until it sits just inside the outer ring.
- 2
Lay the felt over the gathers, pencil side down, with its edge meeting the fold of fabric at the inner ring.
- 3
Thread a needle with 1 or 2 strands of floss, knot the end, and bring the needle up through the felt near its edge so the knot is hidden underneath.
- 4
Work blanket stitch around the edge: needle down through the felt a short way in, out through the fold of fabric at the hoop, with the working thread behind the needle. Keep the stitches about 1/4 to 1/2 in apart. Whip stitch over the felt edge is the simpler option.
Method 3: glued fabric (permanent)
Glue is the fastest finish and the only one that cannot be reversed. The margin is stuck to the inside of the inner ring, so the piece cannot be taken out, washed or tightened again. You need fabric glue or a hot glue gun.
- 1
Trim the margin shorter than for the stitched methods: about 1/2 to 1 in (1.5 to 2.5 cm) beyond the hoop, enough to fold over the inner ring and no more.
- 2
Working a few inches at a time, run a thin line of glue along the inside face of the inner ring and press the margin onto it. Keep the glue below the top edge of the ring so none reaches the front.
- 3
Continue all the way around, pressing small pleats flat as you go. Leave fabric glue to dry for the time on its label before hanging the hoop.
Note.Check tension and centering before the first drop of glue. A glued hoop cannot be retightened or recentered.
Method 4: card or cork insert
A stiff circle pressed into the back hides everything in one piece. Cardstock is the usual choice, and thin cork sheet is used the same way. Held by friction alone, the insert lifts out again. Glued in, it is permanent.
- 1
Trace the inside of the inner ring on cardstock or thin cork sheet and cut out the circle. Try it against the back of the hoop and trim until it sits just inside the ring.
- 2
Fold the trimmed margin to the back. Gather it with Method 1 first, or on a small hoop with a 1 in margin fold it flat toward the center.
- 3
Press the circle into the back of the hoop over the folded fabric so the ring grips its edge. If it will not stay, add a few dots of glue around its rim.
How to hang an embroidery hoop
The screw fitting at the top is the hanger. Nothing has to be added to the hoop, which is why the screw is set at top center before the back is closed.
- On a nail: rest the metal screw bracket over a small nail or pin, so the hoop hangs flat against the wall.
- With a loop: tie ribbon, twine or a few strands of floss through the screw bracket and hang the loop on a hook.
- On a shelf: lean a small hoop against the wall, or stand it on a plate stand or small easel.
How to tell the back is finished properly
Check the piece from both sides before it goes on the wall. A good finish changes nothing on the front. On pale fabric, hold the hoop up to the light as well.
- Front: the fabric still sounds like a drum when tapped, the design is centered, and the screw sits at top center.
- Side: no raw fabric edge shows between the rings or beyond the outer ring.
- Back: gathers, felt or card lie flat enough that the hoop sits against the wall without rocking.
- Pale fabric: no glue mark, knot or folded margin shows through from the front. If one does, re-gather it closer to the ring.
Quick answers
Short answers to the questions that come up when a hoop is finished for display. Each one is covered in more detail in the sections above.
- How do you finish the back of an embroidery hoop? Trim the fabric 1 to 2 in past the hoop, gather it with a running stitch behind the inner ring and tie off.
- How do you frame embroidery in a hoop? Hoop the washed piece centered and drum-tight with the screw at the top, then close the back. The hoop is the frame.
- How do you hang an embroidery hoop? Rest the screw bracket on a small nail, or tie a loop of ribbon through it.
- Which embroidery hoop backing should I use? Felt is the usual choice: it does not fray and can be unpicked. Cardstock is the quick alternative.
What you need for this
- See price on AmazonAmazon
Nurge square plastic embroidery hoops, set of 3
From Best embroidery hoops for hand embroidery: wood vs plastic
- See price on AmazonAmazon
Fiskars 4 in curved embroidery scissors, stainless
From Best embroidery scissors: small, sharp and curved-tip picks
- See price on AmazonAmazon
Clover Gold Eye Embroidery Needles, 16 Pack
- See price on AmazonAmazon
DMC six-strand floss, 36 popular colors, 8.7 yd
From Best embroidery floss for hand embroidery: brand sets compared